

Working with a different database type?
Central SQL Server Database
- SQL Server to a SQL Server
- MySQL databases to SQL Server
- Oracle to SQL Server
- File Maker Server to SQL Server
- dBase (.dbf) to SQL Server
Central MySQL Database

The Basics
SQL-Hub allows you to merge data from multiple databases into a single central view. SQL-Hub is ideal where you have more than one database containing the same types of data. SQL-Hub combines the data from the tables in each of the databases into corresponding merged tables in a central database. Each record is tagged so its source database can be easily identified.
What you need
- SQL-Hub: you need to install the appropriate version of the SQL-Hub database integrating tool for your databases on a Windows machine
- Connectivity: SQL-Hub needs to be installed on a machine that can connect to your source databases and the host for the central database you create
- Permissions: you need to have a login to your database server that allows you to create the merged databases (catalogs/schemas)
- Client Drivers: In most instances no client tools or drivers will be required however in some cases you may need to install some client software or drivers to connect to your databases - see client drivers below
Once these are in place you are ready to start...
Workflow
SQL-Hub setup consists of a few simple steps...
Setting up the Central Database
- To hold configuration information and the merged data
Connecting to a Source
- To gather information about the structure of the source databases
Building the Central Tables
- To create the table structure for the central copies of the chosen tables. This only needs to be done once - but can be revisited at any point
Adding Further Sources
- To connect to each of the source databases - only the connection parameters are required, no additional configuration
Synchronisation
- To merge the data from all of the source databases
The Result:
- A Central Database with a copy of the chosen tables containing the data from all of the source databases
Setting up the Central Database
- Note: Due to limitations of the security model, if you want to use an Azure SQL Server database as the master database you will need the Azure specific version of SQL-Hub - choose "SQL Server Azure" on the download form.
- Open SQL-Hub
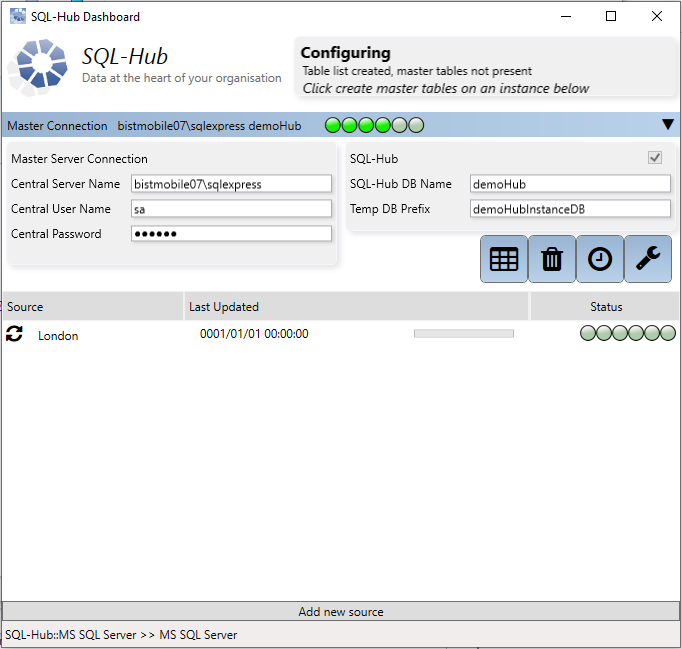
- Configure the Central Database Connection:
Enter the paramaters as follows
| Central Server Name: | the name of the SQL Server the merged central database is to be hosted on. |
| Central User Name: | a SQL Server Username with access to the server and permission to create databases - if you want to use Integrated Windows Authentication enter nothing here |
| Central Password: | the password for the SQL Server user - if you want to use Integrated Windows Authentication enter nothing here |
| SQL-Hub DB Name: | the name for the main merged central view database |
| Temp DB Prefix: | the prefix for central copies of the individual source databases |
- Click Connect:

SQL-Hub will connect to the Central Server
If the connection is not succesful any errors will be shown in the progress panel.
Once the connection is made, an asterisk icon will appear.
- Click on the asterisk to create the Central Database.

Once the above is complete you should be able to see this database in SQL Server and you now need to connect a source database to complete the set up.
- Click Add New Source
Now configure the first source
Connecting a Source
- Click Add New Source
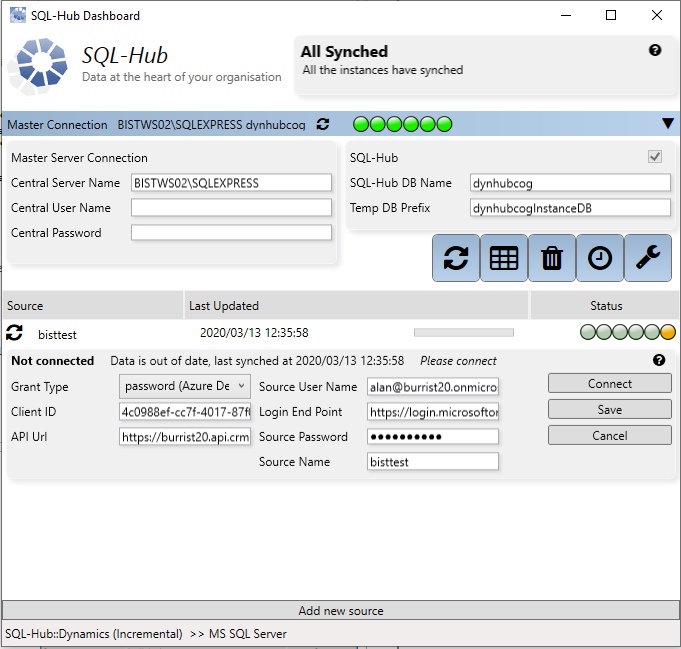
- Configure the Source Connection:
Enter the paramaters as follows
| Grant Type: | the authentication type required for the Dynamics instance - your Dynamics administrator should be able to advise, the options are On Prem, Azure Delegated and Azure Application. If you manage your own instance details of assigning permission can be found below. |
| Client ID: | the client ID to connect to this Dynamics instance (e.g. c24dc744-bd72-49e0-b26e-d1e248acc8bc). |
| API Url: | the instance url for your Dynamics instance e.g. https://myorg.crm4.dynamics.com. |
| (Tenant Name): | for Azure Application Authentication only - the Azure Tenant name |
| (Source User Name): | for delegated and on Prem only - the Dynamics username. |
| Login End Point: | the authorisation end point e.g. https://login.microsoftonline.com/554544c-477d-473b-908f-8fd2da7a191e/oauth2/authorize. |
| (Source Password): | for delegated and on Prem only - the Dynamics User password. |
| (Client Secret): | for Azure Application Authentication only - the the Dynamics Client Secret. |
- Click Connect:
SQL-Hub will connect to the Source Server
If the connection is not successful any errors will be shown in the errors panel.
If the Table List has not yet been created, that is the next step, if it has already been created you can proceed directly to synchronization.
- Click Create Table List:
You can now select the tables you want to include in your merged central database
Check the box next to each table you would like to include if this is your first time configuring a merged central view you might want to just select one or two tables to try out. You can change the table selection later by clicking Update Table List.
- Click Ok
Creating the central tables
SQL-Hub will display a message detailing the current status
- Click Create Master Tables
to create empty copies of the data tables in the merged central database
If you have not used SQL-Hub before you will need to get a FREE licence to create the master tables. To get a licence, click the Get Licence button on the licence panel, top right.
Getting a Licence
- Click on the "Get Licence" button in the Licence panel.
If you cannot see the Licence panel, click on the spanner icon.
You will be directed to the SQL-Hub website. Follow the instructions on the website
Copy and paste the code into the SQL-Hub Licence panel and click Apply.
Remember to click Create Master Tables again once you have your new licence.
Note: Some anti-virus systems (e.g. Webroot) may block the paste action on the SQL-Hub application - if you have this problem set SQL-Hub to "allow" under "Identity Protection" - feel free to switch it back to deny once you've pasted in your licence code
You are now ready to synchronise from this source
- Click Synch
Synchronising
SQL-Hub allows you to synchronise in 3 ways...
On Demand Instance Synchronisation
Synchronise from a single source database from the user interface.
- Click Synch on the panel relating to a specific source.
On Demand Full Synchronisation
Synchronise from all source databases from the user interface.
- Click the Synch All icon on the Master Connection panel.

Scheduled Full Synchronisation
Synchronise from all source databases from the command line automatically. See Scheduling Below
The Synchronisation Process
The synchonisation process creates a database on the central server for each instance database and creates a table in the Central database for each table included.
Data is copied from each source database to a central copy and then inserted in the merged central database table by table. The progress and any errors are displayed.
Once the process is complete you will find tables in the Central Database containing data from all of the synchronised databases and tables.
Scheduling
You can schedule full synchronisation using the Windows Task Scheduler
When running through the UI SQL-Hub stores connection settings in the current user profile - the same user must be used for the scheduler to allow these connection settings to be determined
- Open the Schedule panel, below the Licence panel
- Click "Create Task"
SQL-Hub will automatically create a task to synchronise all sources daily.
You can edit the task using Windows Task Scheduler to suit your requirements. Just find the task in the Windows Task Scheduler Library and adjust the settings.
Your SQL-Hub setup is now complete
You now have everything in place to maintain a central database containing all the data from your source databases
As we say in Manchester, Job's a good 'un